 Kia Sorento: Tilt and telescopic steering
Tilt and telescopic steering allows you to adjust the steering wheel before you drive.You can also raise it to give your legs more room when you exit and enter the vehicle.
The steering wheel should be positioned so that it is comfortable for you to drive, while permitting you to see the instrument panel warning lights and gauges.
WARNING
- Never adjust the angle of the steering wheel while driving. You may lose steering control and cause severe personal injury, death or accidents.
- After adjusting, push the steering wheel both up and down to be certain it is locked in position.
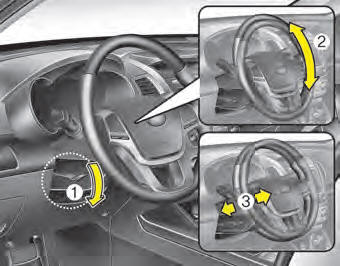
To change the steering wheel angle, pull down the lock-release lever (1), adjust the steering wheel to the desired angle (2) and height (3, if equipped) then pull up the lockrelease lever to lock the steering wheel in place. Be sure to adjust the steering wheel to the desired position before driving.
Heated steering wheel (if equipped)
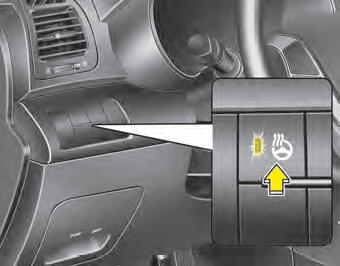
With the ignition switch in the ON position, pressing the heated steering wheel button warms the steering wheel. The indicator on the button will illuminate and notify you on the LCD display.
To turn the heated steering wheel off, press the button once again. The indicator on the button will turn off and notify you on the LCD display.
CAUTION
Do not install any grip to operate the steering wheel. This causes damage to the heated steering wheel system.
Horn
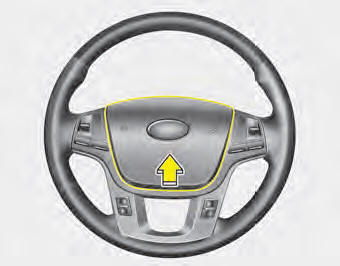
To sound the horn, press the horn symbols on your steering wheel. Check the horn regularly to be sure it operates properly.
✽ NOTICE
To sound the horn, press the area indicated by the horn symbol on your steering wheel (see illustration). The horn will operate only when this area is pressed.
CAUTION
Do not strike the horn severely to operate it, or hit it with your fist. Do not press on the horn with a sharp-pointed object.
Flex steer (if equipped)
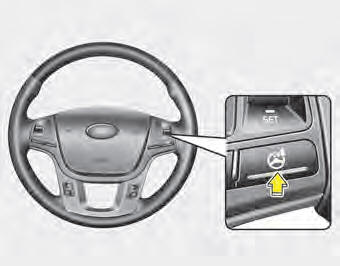
The FLEX STEER controls steering effort based upon as driver's preference or road condition.
You can select the desired steering mode by pressing the FLEX STEER button.
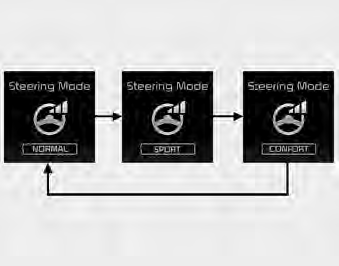
When the steering mode button is pressed, the selected steering mode will appear on the LCD display.
If the steering mode button is pressed within 4 seconds, the steering mode will change as shown above.
If the steering wheel mode button is not pressed for about 4 seconds, the LCD display will change to the previous screen.
Normal mode
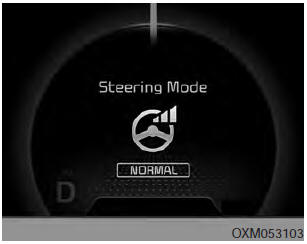
The normal mode offers medium steering effort.
Sport mode

The steering wheel becomes heavier. The sport mode is usually used when driving on the highway.
Comfort mode

The steering wheel becomes lighter. The comfort mode is usually used when driving in the city or when parking the vehicle.
CAUTION
- For your safety, if you press the steering mode button while operating the steering wheel, the LCD display will change, but the steering effort will not change immediately. After operating the steering wheel, the steering effort will change automatically to the selected mode.
- Use caution when changing the steering mode while driving.
- When the electronic power steering is not operating properly, the flex steering wheel will not work.
 Electric power steering (EPS)
The power steering uses a motor to assist you in steering the vehicle. If the
engine is off or if the power steering system becomes inoperative, the vehicle may
still be steered, but it will require ...
 Mirrors
...
See also:
How to use this manual
We want to help you get the greatest possible driving pleasure from your vehicle.
Your Owner’s Manual can assist you in many ways.We strongly recommend that you read
the entire manual. In order to ...
AC Inverter Unit Installation
1.
Install the AC inverter unit.
2.
Install the luggage side trim.
3.
Connect the negative (-) battery terminal ...
Inspection
1.
Turn the ignition switch OFF.
2.
Disconnect the OCV connector.
3.
Measure resistance between the OCV termina ...
